Would you like to make
your own cool musical poster? This Photoshop tutorial will teach you how to do
it.
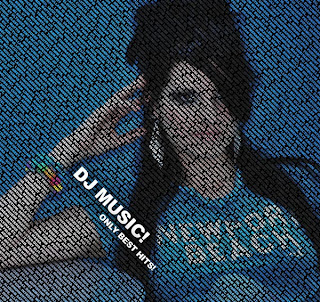
Final Image Preview
Step 1
First we are going to
create a new document in Photoshop with 1000×1000 pixels with all the default
settings. Fill the background layer with black color.
Step 2
Select Horizontal Type
Tool and place any text (white color, caps on) filling all background as you
can see below. Only use one text layer.
Rotate text 45 degrees
CW by going to Edit > Transform > Rotate.
Step 3
Open photo and copy it
to our canvas over text layer. Go to Edit > Free Transform and resize photo
to something similar to what I have.
Select text from text
layer (Ctrl+left click on text layer thumbnail in layers). Press Ctrl+Shift+I
to invert selection. With selection active, select photo layer and press Delete
to clear selection contents.
Press Ctrl+D to
deactivate selection.
Apply Image >
Adjustments > Brightness/Contrast.
Step 4
Create a new layer.
Select Horizontal Tool (Arial, white color, 55px) and write something like “DJ
Music!”. Create a second new layer and write “Only best hits!” (Arial, white
color, 25px).
Rotate text 45 degrees
CW by going to Edit > Transform > Rotate on both layers.
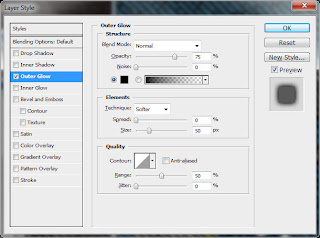
Apply Layer > Layer
Style > Blending Options > Outer Glow to both layer to make it more
readable.
Final Image
This tutorial is now
finished and you got a great effect!


0 comments:
Post a Comment